
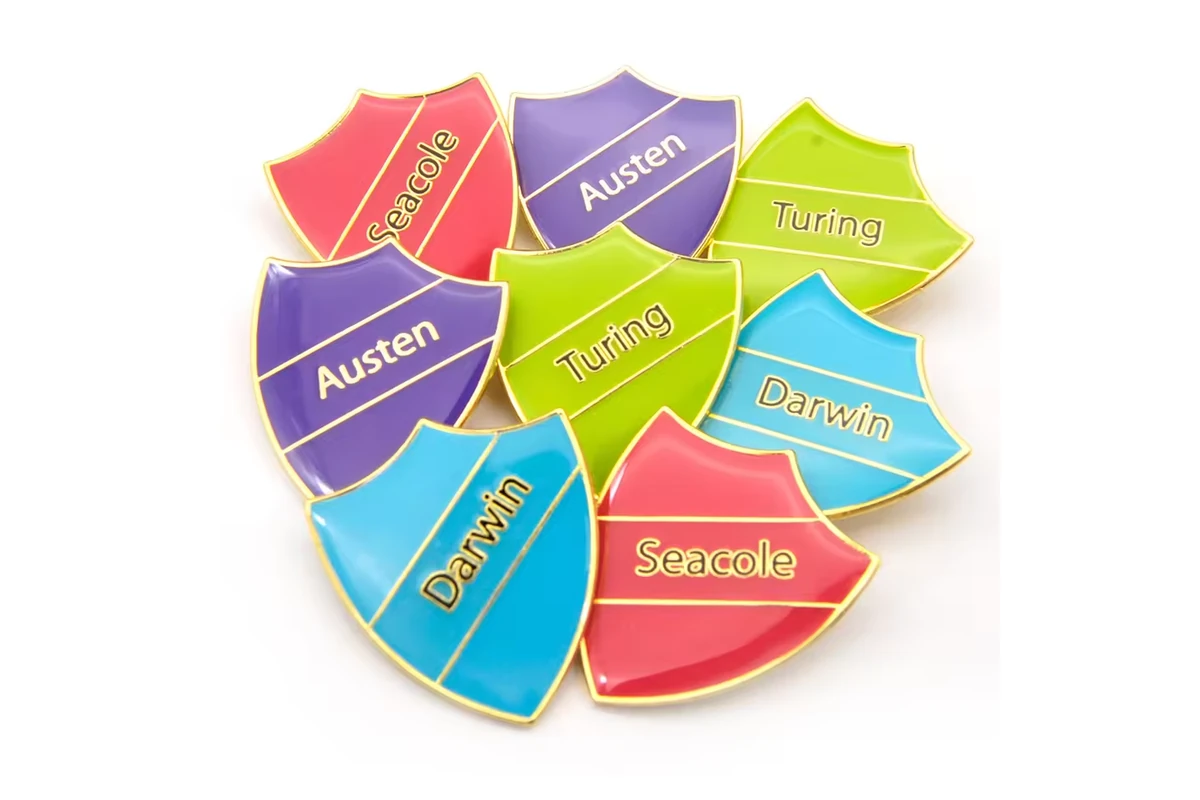
Start a school or club badge order with its purpose, quantity per design, authorized approver and required receipt date. Those four decisions determine the useful design options and the work needed before manufacturing can begin.
A school crest badge, annual membership pin and achievement award may share an emblem but serve different jobs. Treating them as “the same badge with different text” can conceal separate design quantities, approval decisions and future stock requirements.
Use this guide to prepare a brief that your organization and manufacturer can work from. The examples are planning tools, not actual school projects, universal school policies or guaranteed production schedules.
Define What the Badge Must Communicate
Write a one-sentence purpose before choosing a finish: “This badge identifies current members,” or “This pin commemorates the club’s anniversary.” Then identify the wearer, presentation context and information that must appear on the badge itself.
| Badge purpose | Main decision | Information to settle early |
|---|---|---|
| School identity or crest | Recognizable emblem for the intended wearing position | Approved crest version, organization name, essential motto text |
| Club membership | Whether the badge represents continuing membership or a specific year | Renewal model, year requirement and planned carryover stock |
| Leadership or achievement | How the badge distinguishes the role or award | Exact title, recognition criteria supplied by the organization, design variants |
| Anniversary or event | How closely the design is tied to a fixed occasion | Date, event name, distribution quantity and hard deadline |
| Alumni or university presentation | The relationship between the emblem and the gift presentation | Faculty or association identity, approved wording, card or gift packaging |
This is also the moment to decide what can sit on a card instead. A long membership explanation may belong on the packaging; the emblem still needs to work at the badge’s actual size. A year might be essential to annual identification but undesirable on a design intended to be issued over several years.
Do not let an attractive mockup make that policy decision for you.
Give the Crest and Wording One Approval Route
Ask your organization for the current authorized logo file and any relevant brand instructions. A screenshot of an old badge can show a style you like, but it may contain an outdated crest, incorrect spelling or details that are difficult to interpret.
For purchasing coordination, name the people responsible for three decisions:
- Identity: who confirms the emblem, wording, colors and permitted use of supplied artwork?
- Product: who approves size, manufacturing method, attachment, sample and packaging?
- Order: who confirms quantities, budget, destination and production release?
One person may cover all three, but the responsibilities should be explicit. Collect comments internally and send one consolidated response. A manufacturer should not have to choose between an administrator’s attachment request and a committee member’s contradictory email.
Keep approvals with the exact artwork revision. Ask the organization to resolve permission or branding questions through its own process before release. Use its branding and purchasing rules when assigning the approval responsibilities.
Calculate Demand by Design, Then Check the Minimum
Create one row for every different design, including a changed title or year. Ask the manufacturer how each variation affects design counting, tooling, sampling and price. Do not assume that a common crest makes several versions one order quantity.
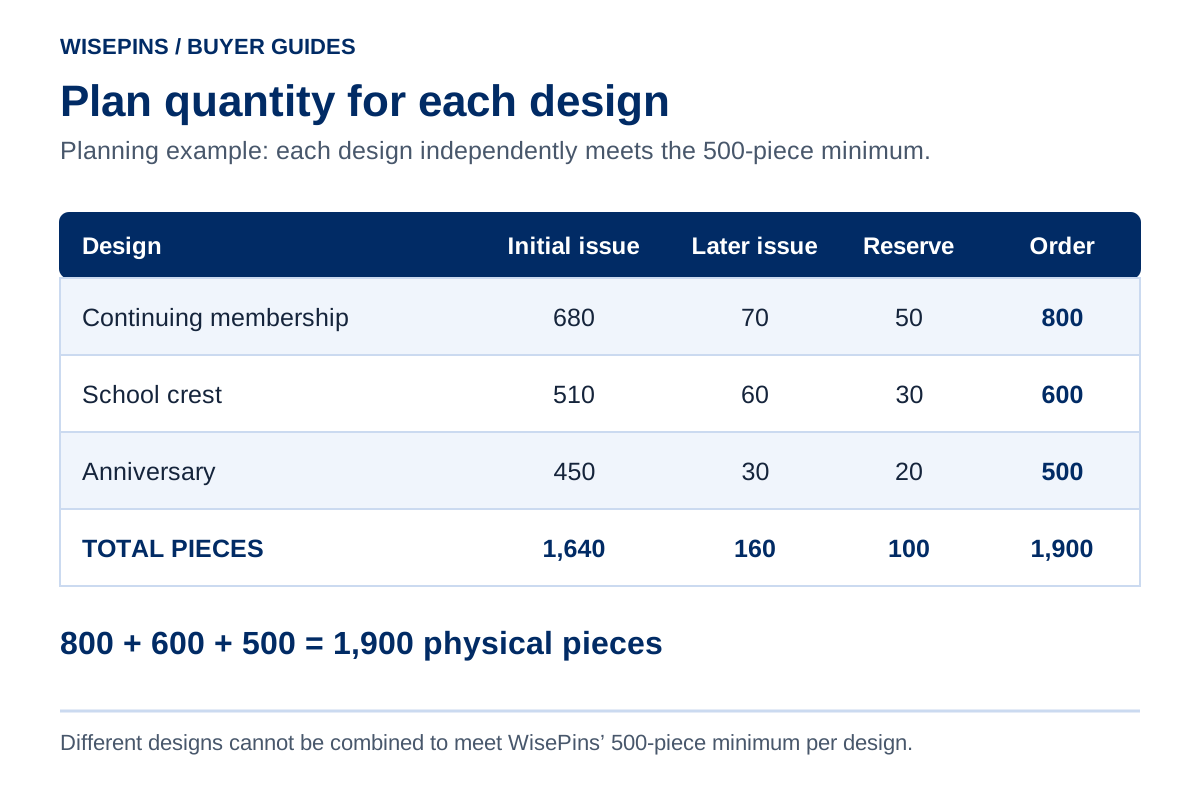
WisePins has a minimum order of 500 pieces per design. Different designs are counted separately and cannot be combined to meet that minimum. This matters before a committee agrees on separate designs for every small group.
A useful demand calculation is:
Planned demand per design = confirmed issue quantity + specifically planned later issue quantity + a chosen replacement reserve.
New purchase need per design = planned demand − usable stock available for this program, with zero as the minimum result.
Count existing stock before requesting production. Only deduct pieces that have the correct design, year and specification, are in usable condition, and are not already allocated to another group. Stock bearing last year's date does not reduce the need for a new dated design. If existing stock covers the planned demand, there may be no need for a new order.
The reserve is an organizational decision, not an automatic percentage. Consider whether the badge remains usable next year, whether replacement demand exists, and how much stock you can reasonably manage.
Worked planning example
Suppose a buyer is planning three designs across its organization and has no usable opening stock. These quantities are hypothetical and do not indicate a WisePins customer or recommended order size.
| Design | Initial issue | Planned later issue | Chosen reserve | Proposed order |
|---|---|---|---|---|
| Continuing-membership pin | 680 | 70 | 50 | 800 |
| School crest badge | 510 | 60 | 30 | 600 |
| Anniversary pin | 450 | 30 | 20 | 500 |
| Total physical pieces | 1,640 | 160 | 100 | 1,900 |
Each row meets the 500-piece minimum independently. The 1,900-piece total is useful for budgeting and distribution, but it does not replace the three design quantities when requesting a quote.
If the same buyer already had 220 usable continuing-membership pins available, the new purchase need for that design would instead be 800 − 220 = 580 pieces. With 350 available, it would be 800 − 350 = 450 pieces. That second requirement is below WisePins' 500-piece minimum for a new order of that design. Existing stock does not count toward a new order's minimum. The buyer would need to assess whether ordering 500 and keeping 50 additional pieces is justified, or revise the purchasing plan. Neither choice should happen silently in the quantity sheet.
Now consider a proposed leadership design needed for only 60 people. Adding those 60 to the 1,900 pieces would not make that new design meet the minimum. Decide whether a separate design is necessary. If the organization accepts a shared badge, role information might be handled elsewhere in the presentation; that is a different specification and purpose, not a way to count different badges together. Alternatively, reconsider the project scope before requesting production.
For dated badges, be particularly careful with surplus. A reserve marked with this year may not serve next year’s membership. Calculate the number you intend to use, then assess whether the manufacturing minimum fits the program.
Choose the Badge Format Around the Design
“School badge” describes a use, not one manufacturing method. WisePins offers enamel, die struck, printed and button badge options, with the specific combination confirmed against your design.
| Design priority | Format to discuss | Question for the manufacturer |
|---|---|---|
| Distinct emblem colors within a metal design | Enamel pin | Which details should be simplified, enlarged or rearranged? |
| Metal relief and an emblem expressed through its surface | Die struck pin | How will raised and recessed details communicate the crest? |
| Full-color artwork, gradients or detailed printed graphics | Printed pin | What will remain readable at the intended finished size? |
| Event artwork and a button badge presentation | Button badge | Which available shape, size and artwork layout suit the event? |
This is a discussion guide, not a claim that every crest is suitable for every method. Provide the essential content and ask for an appropriate manufacturing proposal. The school and club badge collection introduces the available design directions.
Before approving a size, view the crest at actual size. Mark the emblem and wording that cannot change. If a motto becomes hard to distinguish, discuss hierarchy, layout, overall dimensions or another method. Avoid shrinking a detailed letterhead logo and assuming the enlarged screen image predicts the finished badge.
Specify the Attachment and Presentation Together
Tell the manufacturer where the badge will be worn or displayed. Include the intended clothing or bag location, the organization’s attachment requirements and any material or compliance conditions it needs considered. A product choice should follow those requirements.
WisePins can discuss butterfly, rubber, safety pin, magnetic and deluxe clutch options according to the product and design. Their availability does not mean each is appropriate for every wearer or school setting. Do not infer suitability or safety from an attachment’s name. Have the organization confirm its requirements before requesting a quotation.
Use the pin backing selection guide to prepare the wearing-position, handling and reverse-layout questions for the sample review.
Review the complete presentation as well. An individually bagged crest badge, membership pin on a backing card and commemorative gift in a paper box have different distribution needs. WisePins also offers velvet pouches and custom branded packaging, with suitability confirmed for the project.
State the number of badges per package, the required card wording and any sorting or label requests. Ask which requirements can be supplied and how they will be quoted. Do not assume that purchasing a gift box includes assembling several different badges into a set.
The pin packaging guide covers fit, card layout and assembly scope when your program needs a more detailed packaging specification.
Plan Backward From Receipt, Not Dispatch
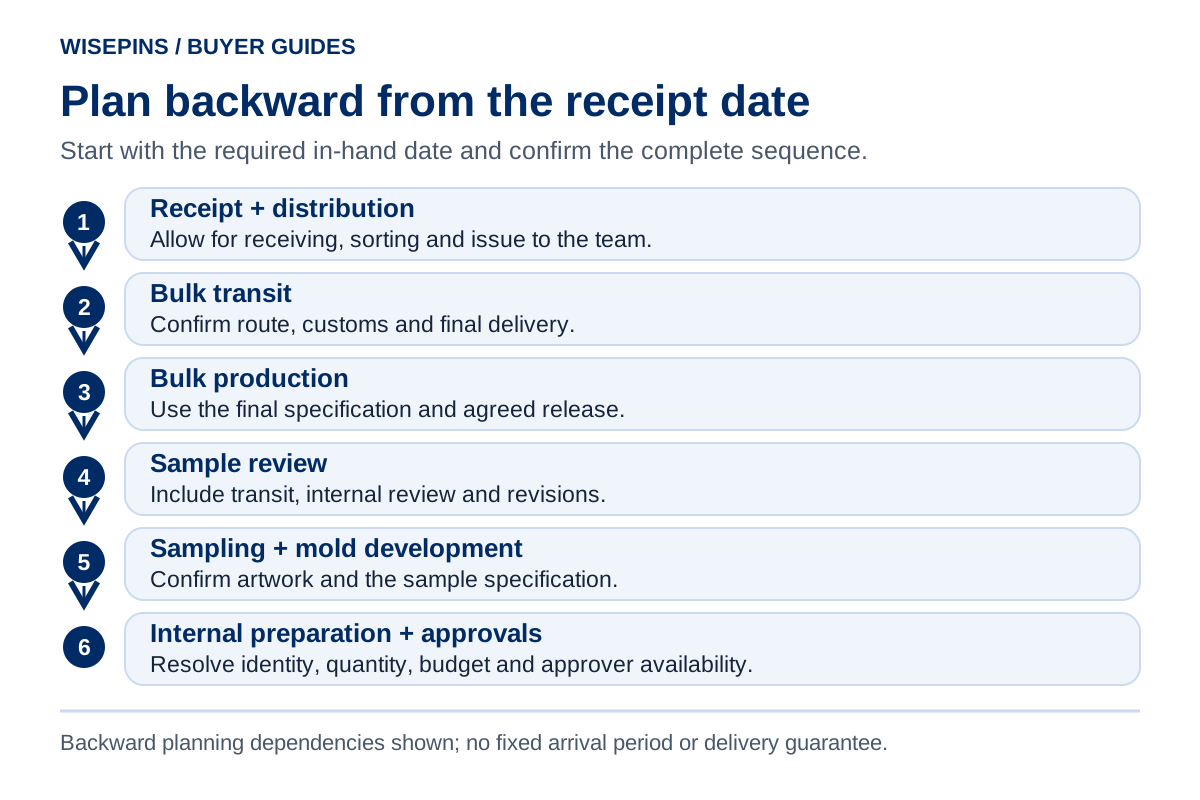
Start with the date when the organization must have usable badges on hand. If an event takes place on a Friday, a parcel arriving late that day may be too late for checking, sorting and distribution.
Work backward through these dependencies:
| Planning stage | What must be resolved |
|---|---|
| Internal distribution | Time for receipt checks, sorting, assembly and delivery to the issuing team |
| Transport to your address | Agreed route, estimated transit, customs and local delivery arrangements |
| Bulk production | Final specification, approved sample and agreed order release |
| Sample review | Time for physical transit if required, internal review and possible revisions |
| Sampling and development | Confirmed artwork and sample specification; new mold development where required |
| Internal preparation | Artwork permission, budget, quantities, purchasing and approval availability |
At WisePins, sampling generally takes 10–15 days. A project requiring new mold development needs approximately 10 additional days. Bulk production usually takes about 20–25 days, depending on specifications and production scheduling. These are usual stage estimates; transit and buyer review are planned separately, and the schedule must be confirmed for your order.
For perspective, using the upper ends of those usual manufacturing ranges gives 15 + 10 + 25 = 50 days for sample making, additional new mold development and bulk production alone. That arithmetic excludes artwork preparation, approvals, sample delivery, revisions, bulk transport and your own receiving time. It is not an order schedule or a recommendation to order exactly 50 days before an event.
Send the required receipt date and destination at the first inquiry. Ask the supplier to assess the whole sequence and confirm a feasible plan. If a crest must go through a committee that meets monthly, put that meeting in the plan: an unapproved drawing cannot move forward simply because a courier service is available later.
Prepare the Supplier Brief and Approve the Sample
Send a Brief That Can Be Quoted
Your initial inquiry does not need every technical answer, but it should identify the decisions you have made and the help you need.
Include:
- Organization and purpose: identity, membership, role, achievement or event.
- Authorized artwork file and exact wording for each design.
- Intended width and height, or a request to discuss suitable dimensions.
- Quantity for each design, with year and title variations separated.
- Preferred format, colors, metal appearance and any essential requirements.
- Intended wearing position, attachment requirements and packaging plan.
- Required receipt date, destination and internal approval availability.
- Sample review expectations and any requested documents or evidence.
Ask the quotation to identify the specification, per-design quantities, sample and setup charges, packaging and transport scope. This makes it easier for the purchasing team to compare options without losing a required feature.
Approve the Badge as It Will Be Issued
Review the sample against the final artwork and specification. Check the exact school or club name, punctuation, year, award title, colors, dimensions, metal appearance, attachment position and packaging text.
Bring in the people responsible for the identity and product decisions. Have them review the same version and collect one response. Do not allow a sample approved by one department to be changed by another without recording the change and checking its effect on the order.
Write down what is approved and what remains open. Identify the sample and artwork revision in the release message. If packaging is still being developed, clarify that separately rather than treating approval of the front badge as approval of the complete order. Our sample development page explains how to begin a sample discussion.
Keep a Reorder File for Next Year
Store the final artwork, specification, approval, supplier quotation, order reference and photographs together. Record which details are intentionally permanent and which must change, such as the year, title or membership wording.
Also keep the issue count, remaining usable stock and the next review date. Next year’s buyer needs to know whether “600 ordered” meant 600 issued or included 90 pieces reserved for later use.
For a reorder, send the prior reference and state “repeat unchanged” or list every requested change. Ask the supplier to confirm the current specification, minimum quantity, tooling availability, pricing and timing. A previous order helps identify the product; it does not automatically reserve tools, stock, price or production capacity.
Frequently Asked Questions
At WisePins, the minimum is 500 pieces per design. Different designs are calculated separately and cannot be combined to reach that minimum. List versions individually and ask how proposed artwork variations will be classified before approving the range.
Include it if the organization needs the badge to identify a particular membership period. If the same design will be issued across several years, consider whether the year belongs in the accompanying presentation instead. Make the decision before calculating future stock.
Yes, it can start the discussion. Supply the current authorized crest file and wording if available, identify what must stay the same, and explain what should change. Do not assume an old photograph establishes the original material, dimensions or manufacturing specifications.
Begin by sharing the required receipt date and destination. The plan must include artwork preparation, approvals, sampling, possible revisions, production, transport and distribution. WisePins confirms timing for the actual project; the usual manufacturing ranges do not establish an all-inclusive delivery lead time.
Send the prior order reference, approved artwork and specifications, new order quantity per design and destination. Calculate the new need after checking usable, unallocated stock; do not count old stock toward the new order's minimum. State whether the design repeats unchanged or list revisions, then confirm current pricing, available tooling, sampling needs and the schedule.
Discuss Your Organization’s Badge Plan
Send your crest or idea, intended use, quantities by design and required receipt date to info@wisepins.com. Tell us which decisions are settled and which your team would like help evaluating.
Browse custom school and club badges, read about production and delivery, or contact WisePins to discuss a specification and sample for your project.
Discuss Your Project